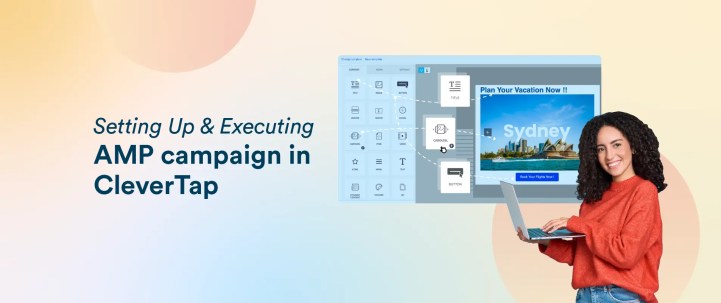
Accelerated Mobile Pages (AMP) for Email allows marketers to include dynamic, interactive content directly within emails—whether that’s submitting forms, viewing carousels, or booking appointments, all without leaving the inbox.
This blog is a simplified guide to walk you through the entire process of creating and executing an AMP Email campaign using CleverTap.
Prerequisites
- Basic AMP for Email Knowledge
- Familiarity with AMP HTML, valid markup, and how it differs from standard HTML.
- CleverTap Account
- Access to Campaigns and the Email module within CleverTap.
- Domain Authentication
- SPF, DKIM, and DMARC records must be set up for your sending domain.
- AMP Code & Fallback HTML
- You should have or be ready to create an AMP email layout (with valid AMP code) and a fallback HTML version.
Whitelisting & Domain Registration with Email Providers
Even if you have an active CleverTap account and properly verified domain, email providers like Gmail and Yahoo often require you to whitelist or register your domain for AMP emails.
- Gmail
- Follow Gmail’s Dynamic Email Registration to submit your domain.
- Ensure you have valid DMARC policies, good sending reputation, and comply with Gmail’s guidelines.
- Yahoo Mail and Mail.ru
- These providers also support AMP for Email. Check their developer documentation for any additional whitelisting steps (though they are generally less stringent than Gmail).
If you skip this step, your recipients using these clients may only see the fallback HTML version instead of your dynamic AMP email.
*Not available on outlook, applemail
Verifying Your Domain in CleverTap
Why It Matters
- To send emails (AMP or otherwise) from CleverTap, your sending domain must be verified. This ensures your DNS records align with CleverTap’s requirements.
Step-by-Step
- Access CleverTap Settings
- Log in to your CleverTap dashboard and go to Settings → Email Domains (or Verified Senders).
- Add Domain & Records
- Enter the domain you intend to use.
- CleverTap will prompt you to add specific SPF, DKIM, and sometimes DMARC records to your DNS.
- DNS Verification
- Once you’ve updated your DNS, wait for CleverTap to verify. This could take minutes or up to 24-48 hours, depending on DNS propagation.
- When verification is successful, CleverTap will indicate your domain is Verified or Active.
- Confirm
- Check that your domain or sender address is shown as valid under your CleverTap account.
Pro Tip: Use email authentication checkers (like MXToolbox) to confirm your SPF, DKIM, and DMARC records are correctly set up before finalizing in CleverTap.
Building Your AMP Email Template
With your domain verified in CleverTap and email providers notified, the next step is creating or uploading your AMP template.
- Draft AMP HTML Code
- Use a code editor or AMP for Email Playground to develop and validate your AMP markup.
- Ensure it includes required tags like <script type=”application/ld+json”> and <style amp4email>
- Ensure the HTML is highlighted as Valid
- Fallback HTML Version
- Write a straightforward HTML fallback for email clients that don’t support AMP (like Outlook Desktop).
- Navigate to CleverTap Campaigns
- In CleverTap, go to Campaigns → Layouts or Templates (naming may vary based on your interface).
- Create New Layout
- Click New Template / Create Layout → AMP Email (or choose a blank template that accepts AMP code).
- Paste AMP Code
- Insert the AMP HTML into the designated editor section.
- Ensure there is a separate section or tab for the fallback HTML, depending on your CleverTap version.
- Preview & Save
- Use CleverTap’s preview feature to confirm basic formatting.
- Save the template for future use in your campaign.
Reference the Docs’ Images: For step-by-step visuals, see the AMP for Email docs page.
Setting up a Campaign
Once your AMP template is ready, you can set up your actual email campaign in CleverTap.
- Create a New Campaign
- Go to Campaigns → New Campaign → Email.
- Name your campaign clearly, e.g., “AMP Launch – Spring Promotion.”
- Target Audience
- Select an existing user segment or define a new one. This is who will receive your AMP email.
- Select AMP Template
- Choose the template you created in the previous step. If CleverTap offers separate sections, ensure both AMP and fallback HTML are correctly loaded.
- Add From Address & Sender Details
- Make sure the From address is the same verified domain you configured earlier.
- Draft your Email
- Keep your subject concise; consider referencing the dynamic nature of your email if relevant.
- Scheduling
- Decide whether to send immediately or schedule for a specific date/time.
- Configure frequency capping or throttling if you want to manage send volume over time.
Testing the AMP Email
Testing is crucial to confirm both the AMP and fallback versions render correctly.
- Supported Clients
- Gmail, Yahoo Mail, and Mail.ru support AMP. Make sure your test includes these clients.
- Send Test Email
- Use CleverTap’s Send Test feature to send the email to a small test group (including yourself).
- Check AMP Rendering
- Open the email in Gmail (web or mobile) or Yahoo.
- Ensure interactive elements (carousels, forms, etc.) work as intended.
- Fallback Verification
- Open the same email in a client that does not support AMP (e.g., Outlook Desktop).
- Confirm your fallback HTML displays properly and includes all necessary content.
- Gmail Whitelisting
- If the AMP portion doesn’t appear in Gmail, double-check you’ve followed Gmail’s registration steps and that your domain is actually approved.
Launching & Monitoring
- Hit Send or Confirm Schedule
- If everything looks good, proceed to send now or confirm your scheduled time.
- Monitor in Real-Time
- Track open rates, click rates, and especially interactions with AMP elements (like form submissions, carousel clicks, etc.).
- Troubleshoot if Needed
- If you see low AMP engagement, investigate domain authentication, recipient email client usage, or potential code errors.
Where to Find & Interpret These Metrics in CleverTap
- Navigate to the Campaigns Dashboard
- Log in to CleverTap and go to Campaigns → Email → Select the specific AMP campaign.
- Open the Campaign Report
- Depending on your CleverTap version, you might see a “Stats” or “Analytics” tab that provides an overview of deliveries, opens, clicks, bounces, unsubscribes, and complaints.
- Look for Advanced Filters
- Some CleverTap interfaces allow you to segment your performance data by device type, region, or specific user properties.
- Custom Event Tracking
- For AMP form submissions or interactive carousel usage, consider setting up custom events within your AMP HTML or redirection links. This data can then appear in your CleverTap Events dashboard.
For visuals on the exact UI layout or how to set up custom events, check the detailed guide.
Best Practices & Pro Tips
- Register with Multiple Email Providers
- Gmail is the most common, but Yahoo and Mail.ru also support AMP. Make sure you meet each provider’s guidelines.
- Design a Strong Fallback
- Not every email client supports AMP. A compelling fallback ensures consistent experience and messaging.
- Validate, Validate, Validate
- Use the AMP for Email Playground to confirm your code is valid before pasting into CleverTap.
- Optimize Media & Code
- Large images or overly complex AMP components can slow rendering. Compress images and keep your AMP code lean.
- Segment & Test Gradually
- Start with a smaller test segment. Iterate on your design before sending to your full list.
- Maintain Good Sending Reputation
- Comply with CAN-SPAM, GDPR, and other regulations. Regularly monitor your bounce rates and spam complaints.
Conclusion
Launching an AMP for Email campaign in CleverTap can significantly boost user engagement by bringing dynamic, interactive experiences right into the inbox. By following the steps above—proper whitelisting, domain verification, building a valid AMP template with fallback HTML, configuring the campaign, thorough testing, and monitoring results—you’ll be well on your way to creating immersive email experiences that stand out in a crowded inbox.
If you need further technical details or run into specific UI differences, reach out to CleverTap Support. Good luck with your first AMP email campaign!
Kiran Pius 
Leads Product Launches, Adoption, & Evangelism.Expert in cross-channel marketing strategies & platforms.
Free Customer Engagement Guides
Join our newsletter for actionable tips and proven strategies to grow your business and engage your customers.


