


Table of Contents
Categories
Most Popular


From early on, our team used ELK (Elasticsearch-Logstash-Kibana) for log management and analytics. ELK served us well, but as our business has grown we’ve found ourselves fighting to scale. We needed a more flexible, easy-to-manage solution, particularly for clustering, and it need to be on-premises.
Long story short, we chose Splunk. The specifics on why, and our learnings on migrating from ELK to Splunk, are a story for another day. For today, we’ll focus on our experience configuring Splunk Cluster SSO login via SAML with Google (G Suite) as the Identity Provider.
We struggled to find much helpful, implementation-specific documentation on the subject, and fought our way through largely via trial and error. We’re hoping you’ll find this step-by-step implementation guide useful in saving you time and effort.
Background
SAML, Security Assertion Markup Language, is an XML-based open standard for exchanging identity, authentication, authorization, and assertions data between different entities, generally between a service provider and an identity provider. With SAML you can support Single Sign On (SSO) to multiple systems. A large number of Enterprises and Service providers select this as protocol for exchanging identities. SAML removes dependency on platform and vendor as well as concerns of password and security, and provides a one-point authentication for service providers.
SAML authentication works on a trust-authentication basis between a Service Provider and an Identity Provider. The Service Provider trusts the Identity Provider origin with authenticating users and the Identity Provider generates security assertions for authenticated users for use by the Service Provider.
SAML is simple to use and secure.
- A single user password/identity provider for multiple different systems
- Avoids exposing passwords to service providers
- Service providers never communicate with Identity Providers – no need for network connectivity between them
- There is no token, session or user-related data stored at the Service Provider
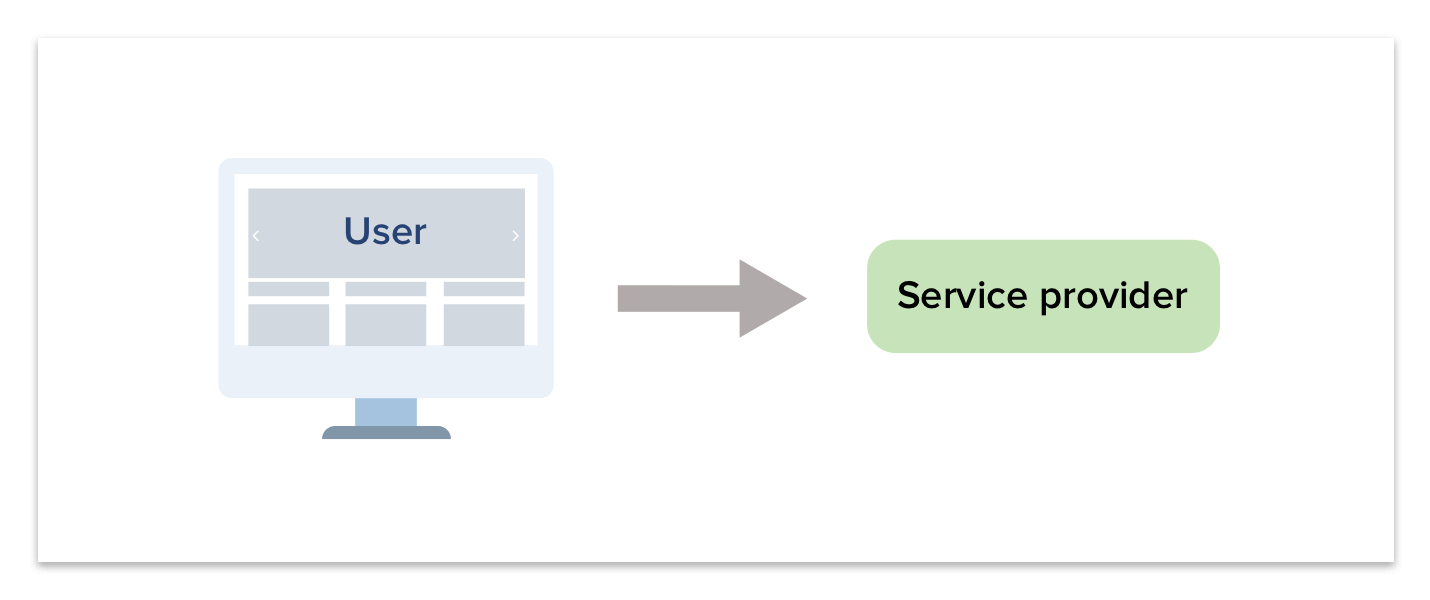
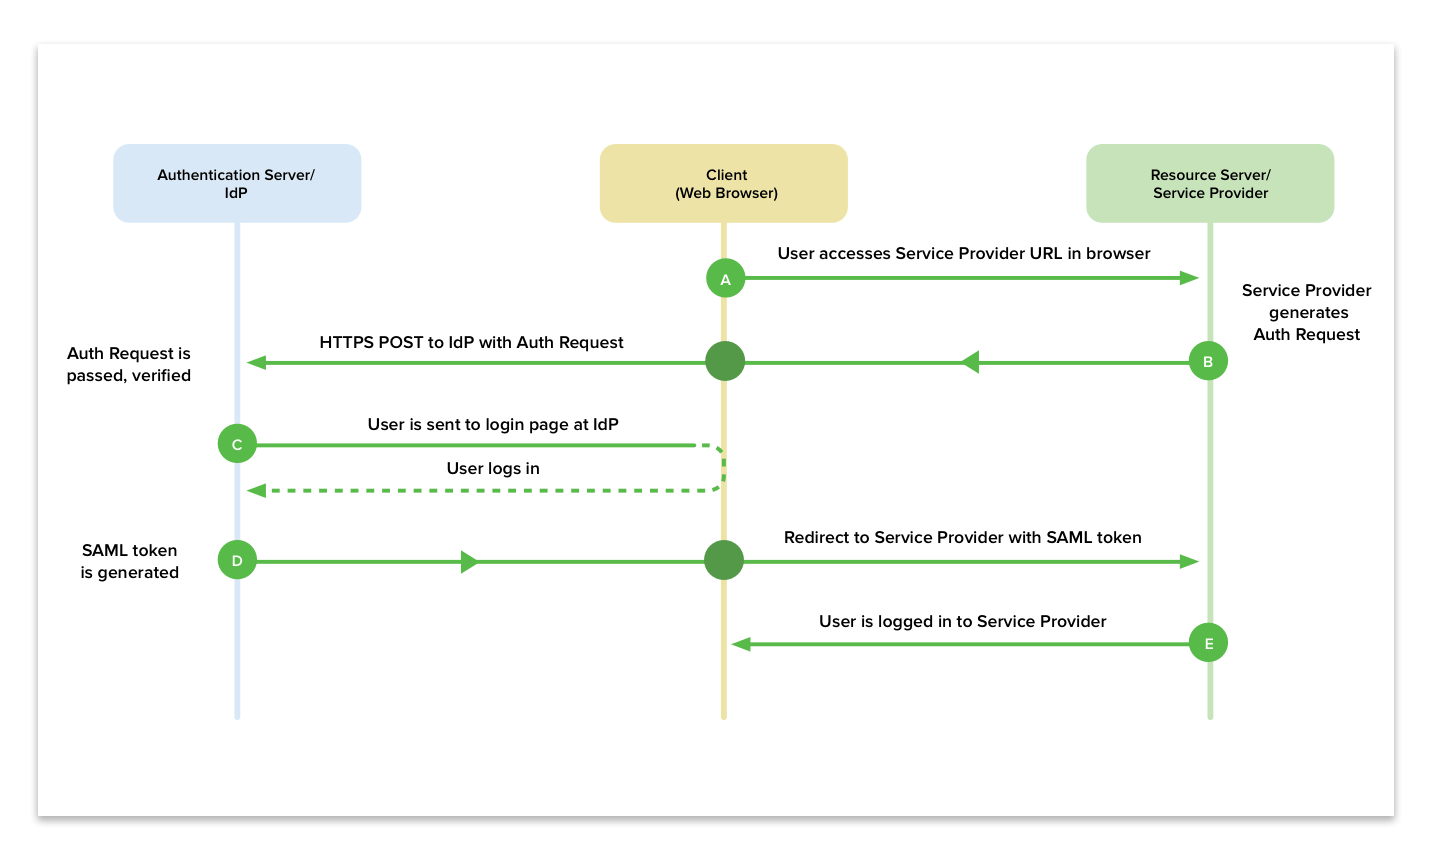
The SAML authentication flow is as follows:
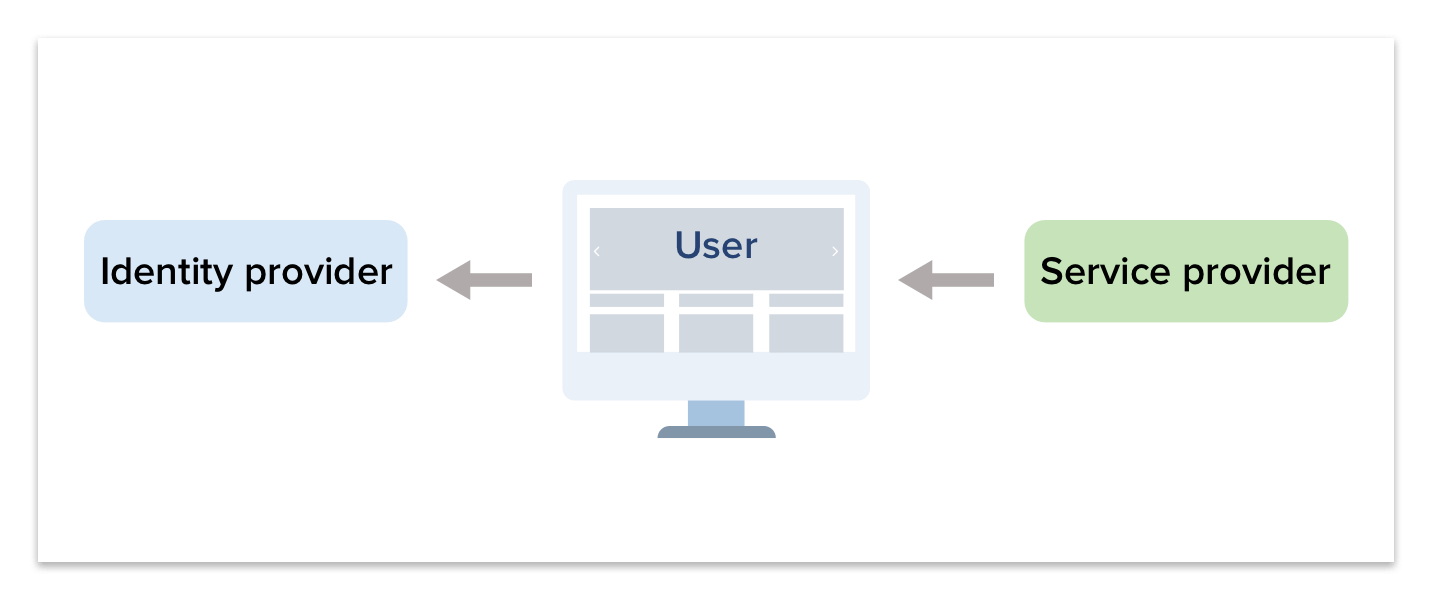
- User tries to connect to the Service Provider from a browser.

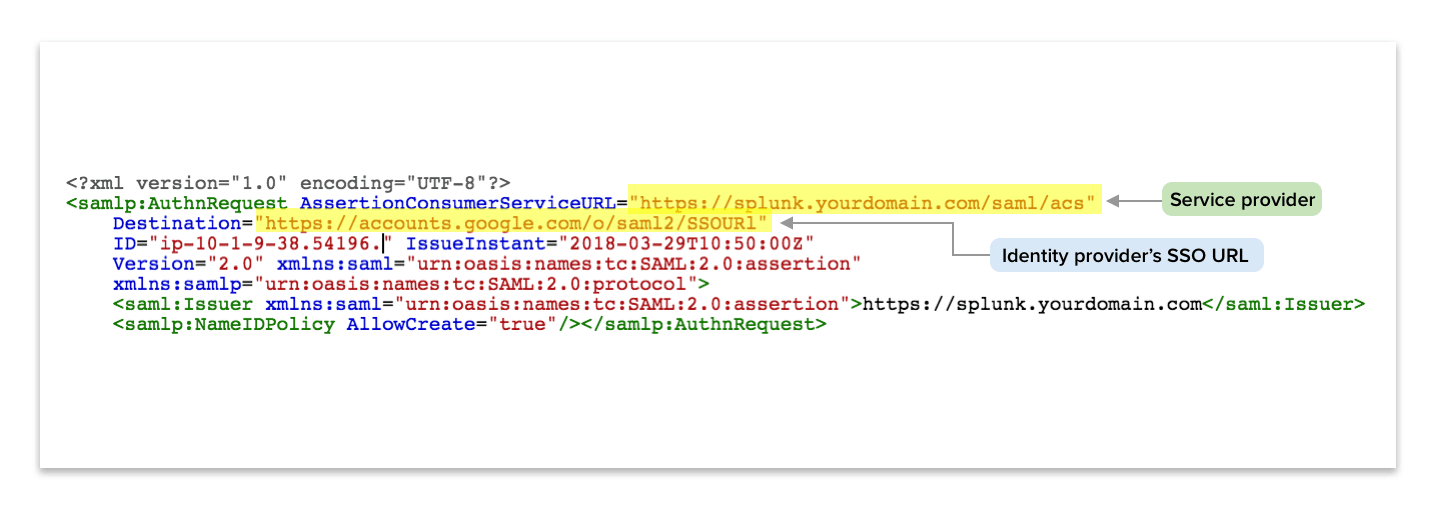
- Service Provider responds with a SAML response and Identity Provider url to redirect. Browser receives response and redirects to Identity Provider with SAML response.
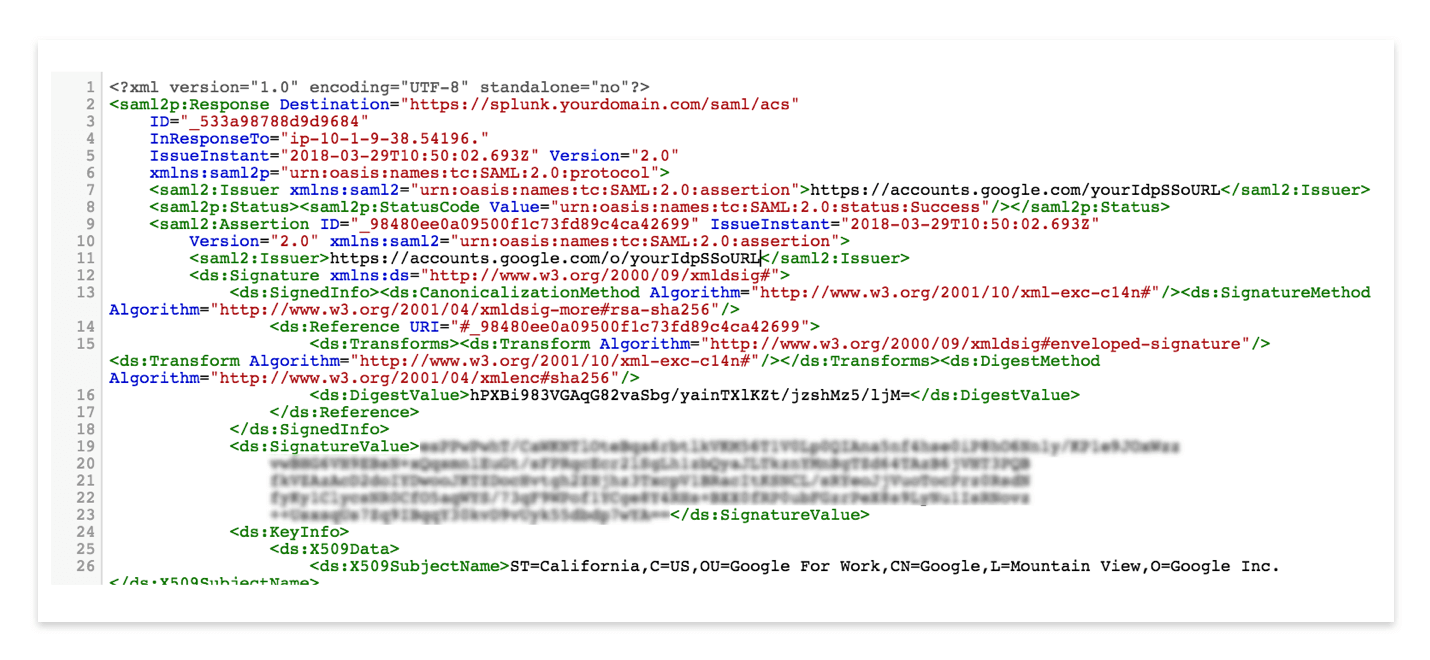
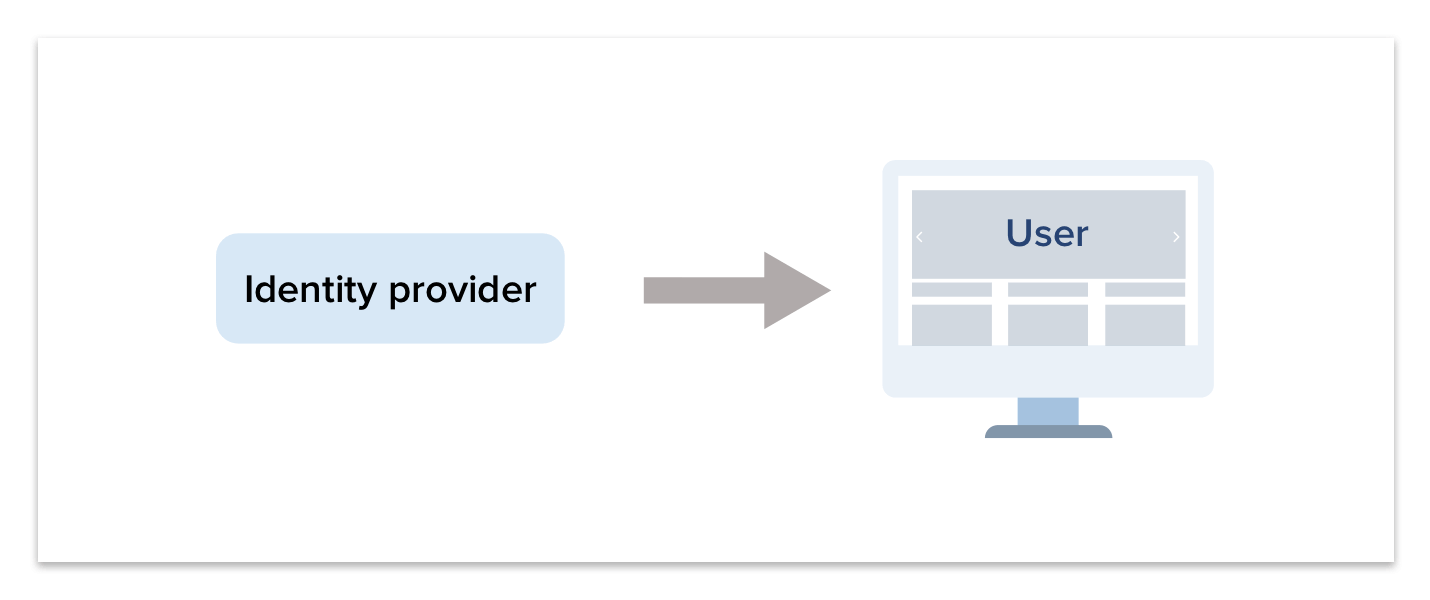
- The Identity Provider receives the redirected request, authenticates the user and generates a SAML response to the browser.
- The browser forwards the SAML response to the originating Service Provider. With attributes available user profile fields.
- The Service Provider verifies the SAML request and logs the user in.

Configuring SAML SSO Authentication for Splunk with G Suite
Step 1: Create a Custom User Attribute in G Suite with an Attribute Name Role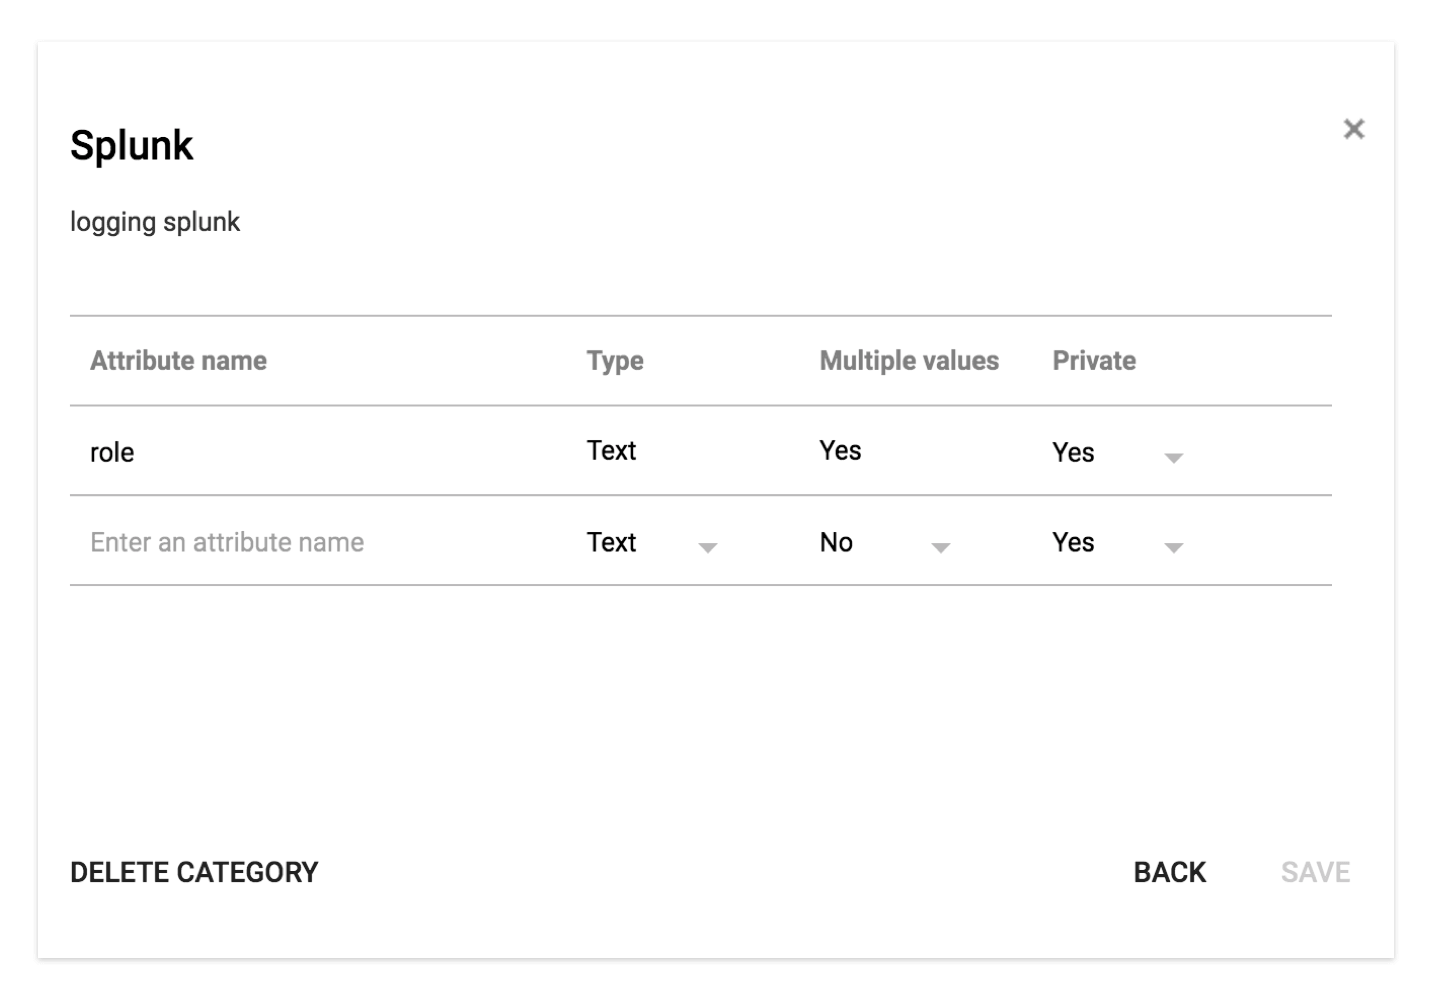
Step 2: Add a Custom SAML App in the G Suite Admin Panel
When adding an SAML application you will see a number of application types which Google supports, but Splunk isn’t one of them. So you have to create your own custom app, as described in the Google support docs.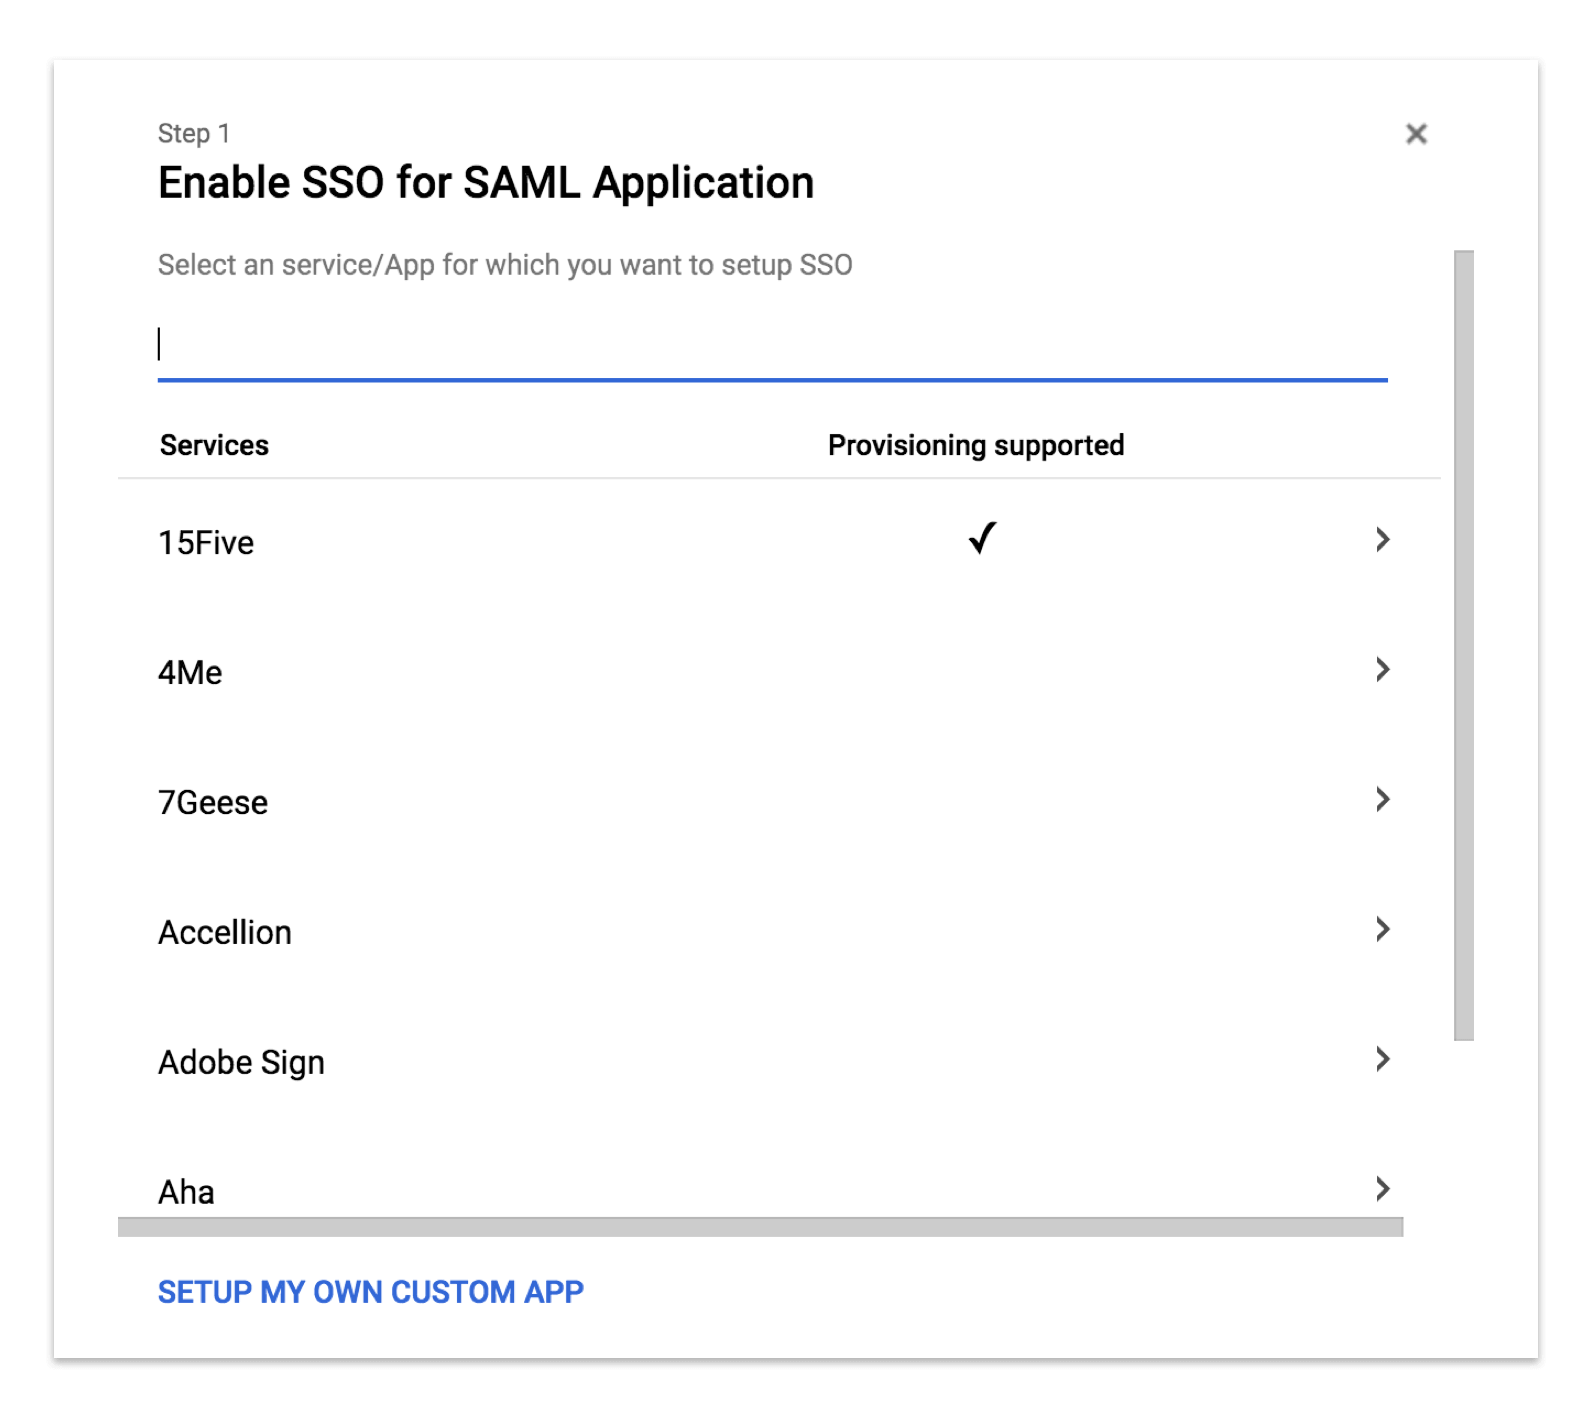
In the next setup screen, we get information about the Google identity provider configuration: SSO URL and Entity ID and Certificate. We will need this information for Splunk to connect to G Suite.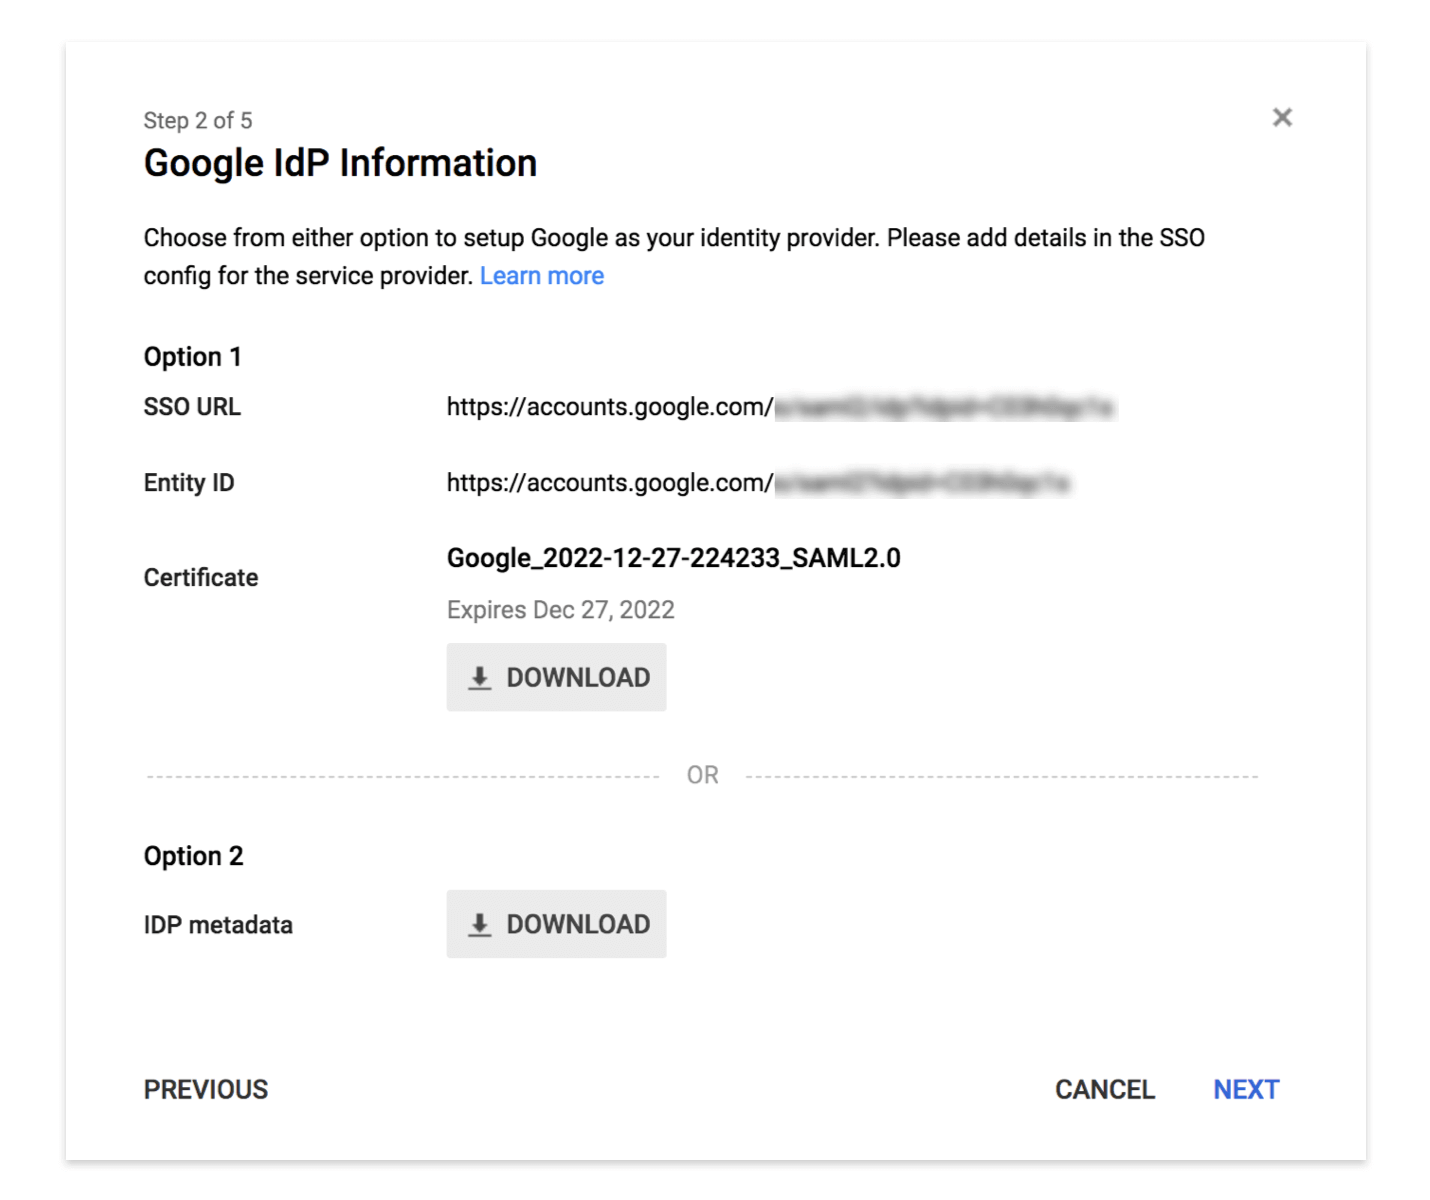
Note the SSO URL and Entity ID, download the certification, and upload it to your Spunk home folder with the appropriate read permissions for Splunk.
In the next setup screen enter basic display information about your app.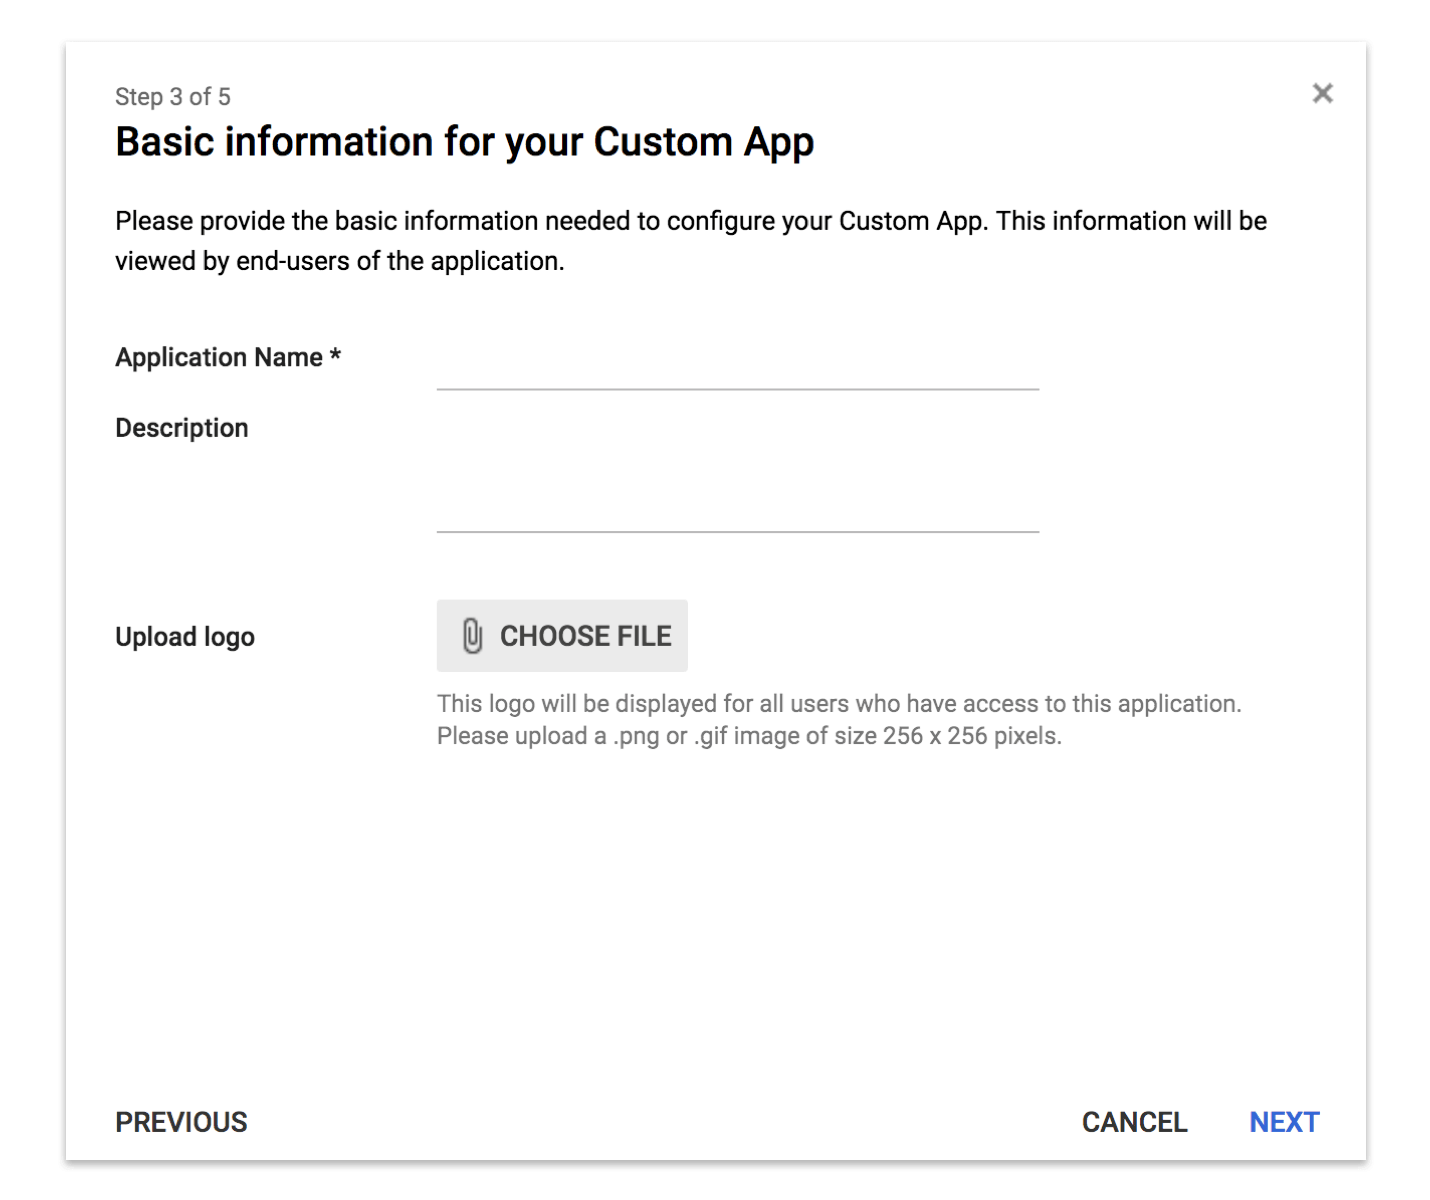
In the following setup screen enter the configuration information for your Service Provider.
The ACS (Assertion Consumer Service) URL is the url that will handle session management messages. It is typically at https://<yoursplunkdomain.com>/saml/acs.
For Entity ID you can add https://<yoursplunkdomain.com>.
Similarly, Start URL is your splunk web server domain, e.g. https://<yoursplunkdomain.com>.
Name ID : Subject to communicate between IDP and Service Provider
Then map attributes for user fields which will be exchanged between Splunk and G Suite, e.g. role, name, and email. You can modify these later if needed.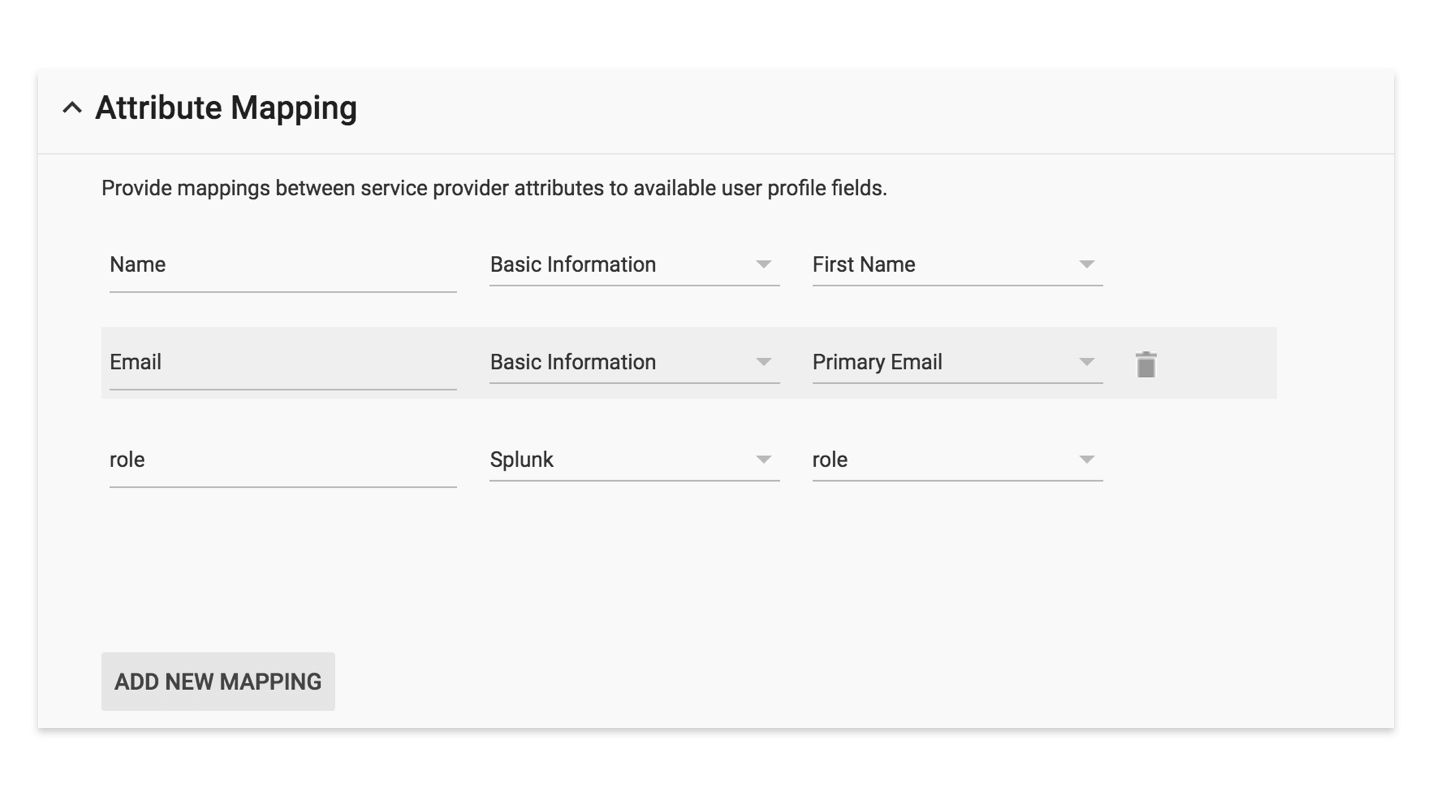
Step 3: Configure Splunk to Use IDP (Identity Provider) Credentials
There are two ways to configure Splunk to use Google as the IDP.
Using the Splunk Web dashboard.
- Login to Splunk
- Go to Settings
- Go to access control in users and authentication
- Click on authentication method
- Select external method SAML and click on SAML settings
- Then SAML configuration in top right corner
- If you downloaded XML from Google, upload it in Metadata XML
- Otherwise you can manually enter:
- The SSO URL you noted when creating your SAML app
- SLO: update as – https://accounts.google.com/Logout?hl=en&continue=https://mail.google.com/mail
- The path to the G Suite certificate you uploaded to Splunk.
- Issuer ID: the G Suite Entity ID
- Entity ID: the Entity ID you entered when creating your SAML app
- In SSO and SLO binding select protocol as ‘HTTP redirect’
Configure via configuration files:
- Edit or add a configuration file named authentication.conf at location
$SPLUNK_HOME/etc/system/local/authentication.conf
It will override the default parameters.
Example:[authentication] authSettings = saml authType = SAML [saml] entityId = https://splunk.yourdomain.com fqdn = https://splunk.yourdomain.com idpCertPath = $SPLUNK_HOME/etc/auth/idpCert.pem idpSLOUrl = https://accounts.google.com/Logout?hl=en&continue=https://mail.google.com/mail idpSSOUrl = https://accounts.google.com/o/saml2/idp?id=xxxxxxxxxxx issuerId = https://accounts.google.com/o/saml2?idpid=xxxxxxxx redirectAfterLogoutToUrl = https://splunk.yourdomain.com redirectPort = 443 replicateCertificates = false signAuthnRequest = true signedAssertion = true sloBinding = HTTPRedirect sslKeysfile = /opt/splunk/splunk/etc/auth/server.pem sslKeysfilePassword = asdhalsdkaslkdalsdhalshdlasdhl ssoBinding = HTTPRedirect - Save
- Restart Splunk
Step 4: Select G Suite Users to Allow Access to Splunk
- Login to G Suite admin
- Select users
- Select user to give access to
- Select account
- Click on edit below Manage user attribute
- Enter role for that user
- Splunk supports multiple user roles. Should update as role what you want to give to that user. For example, roles are: user, admin, can_delete, power. Every role has an operation defined for it. Select what is relevant for that user.
- Update user
Now, that user should be able to login to Splunk using SSO.
That’s it! We hope you find this guide useful, and may the Force be with you.
kishlaya kumar 
Kishlaya Kumar, with over 9 years in DevOps, backend development, and system architecture, innovates practices for seamless software delivery and operational excellence.
Free Customer Engagement Guides
Join our newsletter for actionable tips and proven strategies to grow your business and engage your customers.