Did you know that 3 out 4 of consumers feel frustrated when website content isn’t personalized? That frustration translates into lower engagement, reduced time on site, and ultimately, lost conversions. Marketers need to increase their experimentation velocity when it comes to their website’s user interface. If only marketers could personalize web experiences in real time without depending on developers or long release cycles.
In our previous post, we introduced the Web Visual Editor, CleverTap’s no-code tool designed to help marketers easily create on-site messages and campaigns. In this blog, we’ll walk you through how to set up your first Web Visual Editor campaign and how to check its performance stats so you can make data-driven decisions and continuously improve your results.
What Is the Web Visual Editor?
The Web Visual Editor is a no-code tool inside CleverTap that allows marketers to easily personalize and modify existing on-site elements; such as editing headlines, images, CTAs, or text on a live web page.
With this editor, you can make live changes directly on your website, target specific audiences, and preview your work before publishing — all without needing engineering support.

Step 1: Setting Up Your Web Visual Editor Campaign
a. Access the Editor
From the dashboard, create a campaign, and under ‘Messaging Channels’ navigate to Web Native Display, and click Create New Message. Select Visual Editor to launch the editor.

b. Select Target Page or Element
Choose the specific web page or page element where you want your message to appear. The on-screen selection tool lets you highlight elements directly on your site.

c. Design Your Message
Use the drag-and-drop interface to add headlines, body text, images, and CTA buttons. You can also adjust colors, fonts, and layouts to match your brand. Make sure to preview how the message will look on both desktop and mobile.
d. Set Targeting Rules
Define the audience segments you want to target — for example, new visitors, returning users, or visitors who abandoned their cart. This ensures your message reaches the right people.

e. Launch the Campaign
Once you’ve reviewed all settings and previewed your message, hit Publish to go live.
Pro Tip: A/B test different headlines, visuals, or CTAs to find what resonates best with your audience.
Step 2: Checking Campaign Stats
a. Navigate to Campaign Analytics
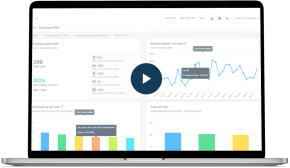
Go to Web Native Display, find your active campaign, and click on Stats to access its performance dashboard.

b. Understand the Metrics
Here are the key metrics you should monitor:
- Impressions: How many times the message was shown.
- Clicks: How many times users clicked on the message.
- CTR (Click-Through Rate): Percentage of impressions that resulted in a click.
- Conversions: Custom goals you set (like form submissions or purchases).
c. Use the Insights
Look for patterns in the data:
- Which messages have the highest CTR?
- Are certain audience segments engaging more?
- Are dismissals high? That may signal the need to adjust design or targeting.
Continuously refine your campaigns by tweaking visuals, copy, triggers, and audience rules based on these insights.
Best Practices for Marketers
- Keep it clean: Avoid cluttered designs; stick to one clear message per campaign.
- Stay on brand: Make sure visuals align with your brand guidelines.
- Be selective with targeting: Don’t blast messages to everyone; segment wisely.
- Test and iterate: Use A/B testing and regularly review stats to improve over time.
Conclusion
With CleverTap’s Web Visual Editor, marketers have the power to launch, personalize, and optimize web campaigns without technical headaches. By following the steps in this guide, you can deliver tailored experiences that drive engagement and results.
Kiran Pius 
Leads Product Launches, Adoption, & Evangelism.Expert in cross-channel marketing strategies & platforms.
Free Customer Engagement Guides
Join our newsletter for actionable tips and proven strategies to grow your business and engage your customers.


