


Table of Contents
Categories
Most Popular


Best practices for engaging your app users with iOS push notifications
Push notifications are an important tool to re-engage users outside of your app. Moreover, for both Android and iOS users, notifications have become one of the primary ways of interacting with their devices, with users accessing more and more app functionality directly from the notifications rather than opening the app itself.
So, the lock screen/notification bar/center has become a prime battleground in the competition for user’s time and attention. As a result, earning, and keeping, the privilege of sending your users push notifications has become an even more crucial aspect of any app’s user engagement strategy.
Primo real estate!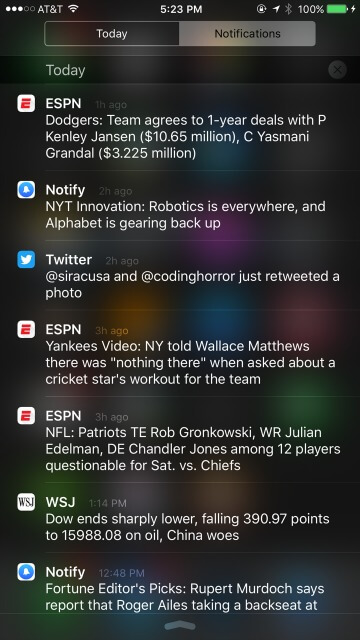
That’s why at CleverTap we work hard to give you the tools to segment, target, schedule and personalize your notifications so you can make the most of that all-important privilege.
But, before you get there, you have to ask for, and be given, push notification permission by the user.
On Android, its pretty straightforward: the permission request is added to the app’s AndroidManifest.xml and subsumed in the all-or-none standard permissions list displayed on app install.
On iOS things are a little trickier. You must trigger the iOS push notification permission request in your application code, and, when you do, the user will see a system dialog that looks like this.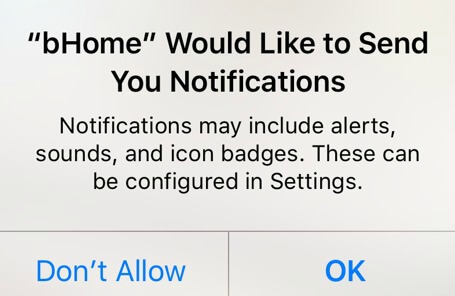
Given the way the iOS push notification permission system works, it’s critical for the user to grant your app permission the first time she is asked. That’s because if the user taps “Don’t Allow”, it takes multiple taps within the Settings app to re-grant permission, making it extremely unlikely, and effectively irreversible.
So, you’ve got to do everything you can to get that “OK” tap once the user sees the permission dialog.
While each app is different, an approach that we’ve seen be generally effective in maximizing acceptance is where:
- you ask the user for permission to send iOS push notifications at a point in your app where there is a clear need and you can effectively explain the benefit to the user, and
- where you first show the user a “soft” permission dialog you create yourself to gauge their willingness to grant the real permission, before you trigger the “real” system dialog.
If the user denies your “soft” dialog, its extremely likely they would also deny the “real” system dialog, so you’re better off not triggering the system dialog at that point. This way, you haven’t lost the ability to try again at a later point when they might be more apt to say yes. If, on the other hand, the user accepts your “soft” dialog, it’s highly likely they will accept the subsequent official dialog as well, so immediately showing them the “real” dialog is a good bet.
True, this leads to the user being shown 2 dialogs in succession, but, in our experience, in practice this isn’t a problem for the the vast majority of users.
Taking this approach is easier than you might think. While you can design your own “soft” dialog, we’ve found the standard iOS dialogs to be effective as well. Here is a snippet from an example using a UIAlertController:
UIAlertController *alertController =
[UIAlertController
alertControllerWithTitle:@"Let Us Send You Push Notifications?
message: @"We'll only notify you of content that's interesting and relevant to YOU."
preferredStyle:UIAlertControllerStyleAlert];
UIAlertAction* denyAction = [UIAlertAction
actionWithTitle:@"No, Thanks"
style:UIAlertActionStyleDefault
handler:^(UIAlertAction * action)
{
softPushDenied = YES;
[self saveToUserDefaults:@(1) forKey:@"softPushDenied"];
[alertController dismissViewControllerAnimated:YES completion:nil];
}];
UIAlertAction* allowAction = [UIAlertAction
actionWithTitle:@"Yes, Please"
style:UIAlertActionStyleDefault
handler:^(UIAlertAction * action)
{
[alertController dismissViewControllerAnimated:NO completion:nil];
[self requestPushPermissions];
}];
[alertController addAction: denyAction];
[alertController addAction: allowAction];
[self presentViewController:alertController animated:YES completion:nil];
-(void)requestPushPermissions {
UIUserNotificationSettings *settings =
[UIUserNotificationSettings
settingsForTypes: UIUserNotificationTypeAlert | UIUserNotificationTypeBadge | UIUserNotificationTypeSound
categories:nil];
[[UIApplication sharedApplication] registerUserNotificationSettings:settings];
[[UIApplication sharedApplication] registerForRemoteNotifications];
}
The result will look something like this. The initial “soft” dialog rendered via our UIAlertController: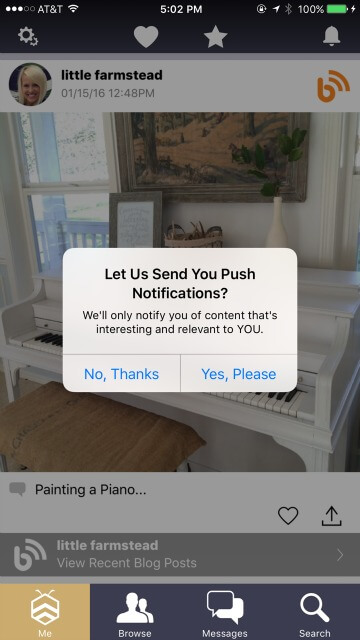
If the user says No to our “soft” dialog, we don’t risk showing them the system dialog, preserving our opportunity to try again later.
If, on the other hand, the user says Yes, we immediately trigger the system dialog.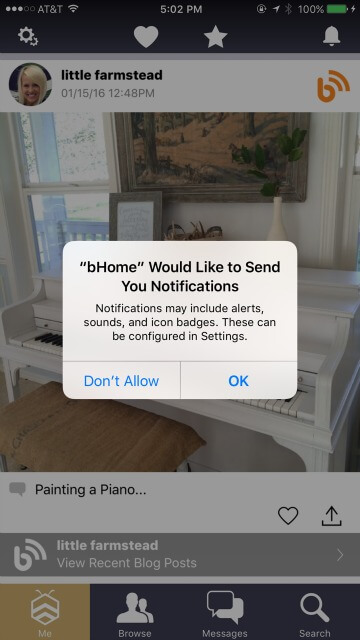
Best of luck with your iOS push notifications!
Peter 
Peter Wilkniss, SVP of Engineering at CleverTap, focuses on product development and innovation.
Free Customer Engagement Guides
Join our newsletter for actionable tips and proven strategies to grow your business and engage your customers.