Learn how you can Unlock Limitless Customer Lifetime Value with CleverTap’s All-in-One Customer Engagement Platform.
The latest Android version named after the famous cookie brand Oreo released on 21st August and is now live on Google’s new phone Pixel 2. Since Google launched Pixel 2 on 19th October, everyone in the Android world has been racing to develop their apps for the latest version. If you have also started developing your app for the latest Android version, then this blog will help you through the fancy new push notification feature of Android O. In part 1 of this blog, I explained how to create Notification Channels and to use the Notification Badges. In this part, I will explain how you can use CleverTap to smoothly help you send Push Notifications to your Android O app with almost no coding effort.
Since Notification channels and badges are the features of the latest Android version, you as a developer will have to update your SDK and Build tools to the latest versions. The latest SDK tools version is 26.0.2 and the latest Build tools version is 26.0.2. You will have to make sure that in your build.gradle file, the compileSdkVersion is 26 and buildToolsVersion is 26.0.1
android {
   compileSdkVersion 26
   buildToolsVersion "26.0.2"
}
Also your app should have integrated the CleverTap Android SDK to be able to send push notifications via the dashboard.
Once you have the CleverTap Android SDK integrated successfully, you can create a Notification channel in your app by using the following line of code –
CleverTapAPI cleverTapAPI = CleverTapAPI.getInstance(getApplicationContext());
cleverTapAPI.createNotificationChannel(getApplicationContext(),"YourChannelId","Your Channel Name","Your Channel Description",NotificationManager.IMPORTANCE_MAX,true);
You can create more than one channel using the above line of code, just make sure that the channel ID differs in every Notification Channel. Also this Channel ID will be used to send Push Notifications using the CleverTap dashboard.
To send Push Notifications, login to the CleverTap Dashboard and on the left navigation menu click on Campaigns. Then click on +Campaign button on the top right to select Mobile Push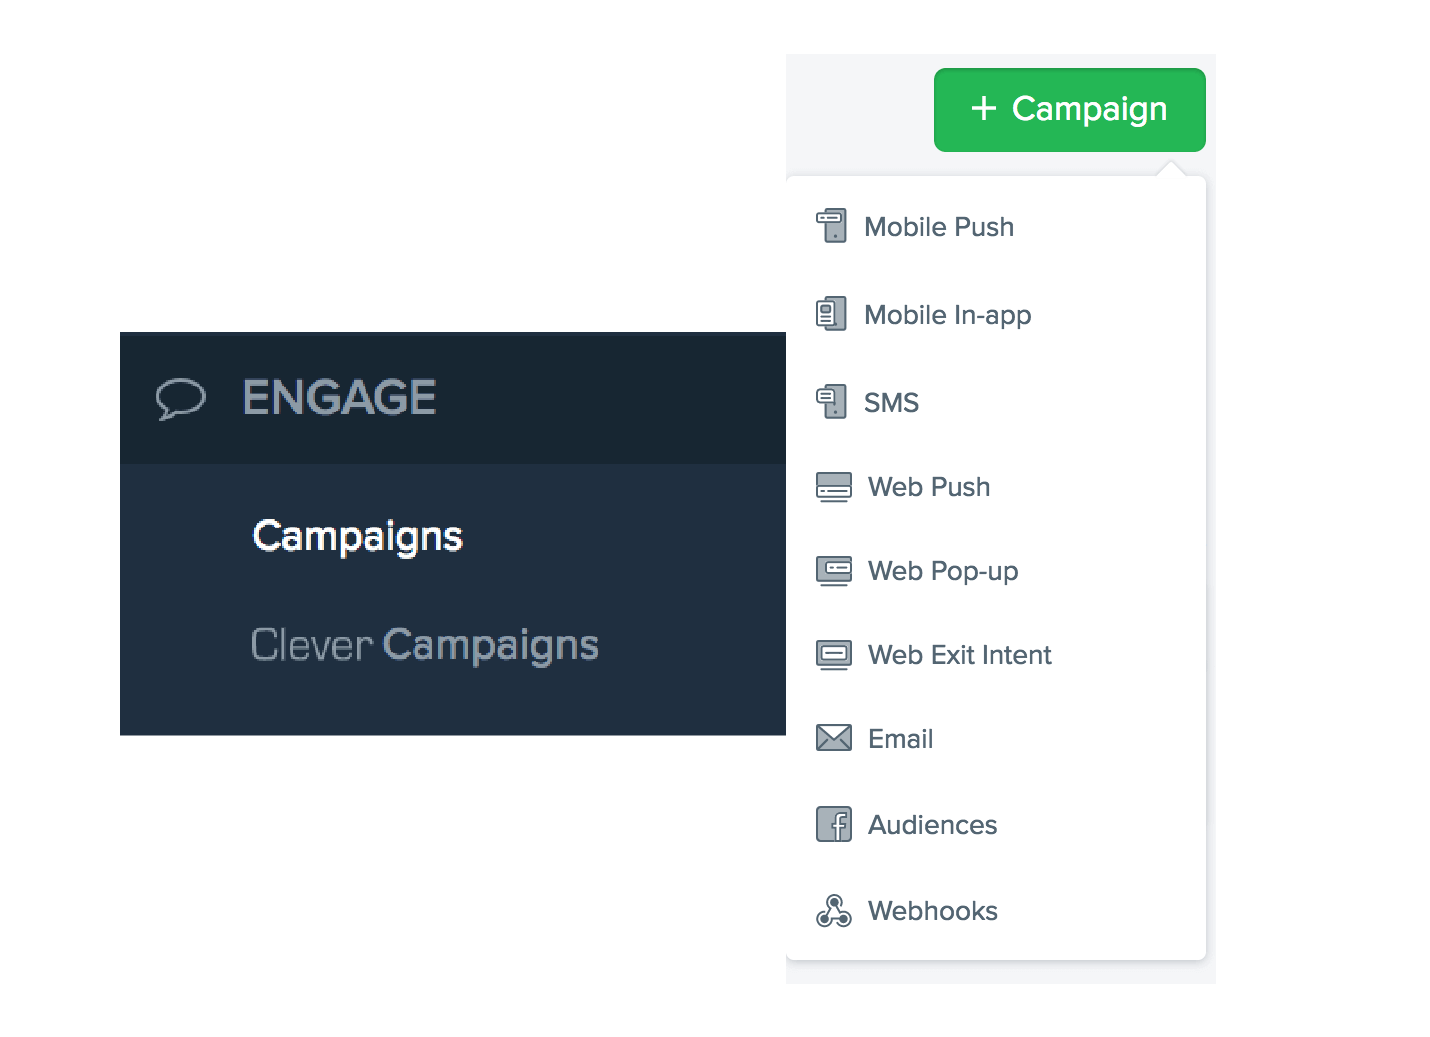
Now setup your Push Notification campaign by selecting when you want to send out your notification, who do you want to send it out to (in this case it will be Android users) and what kind of push notification you want to send out. Once you reach the what section, select the Single Message option.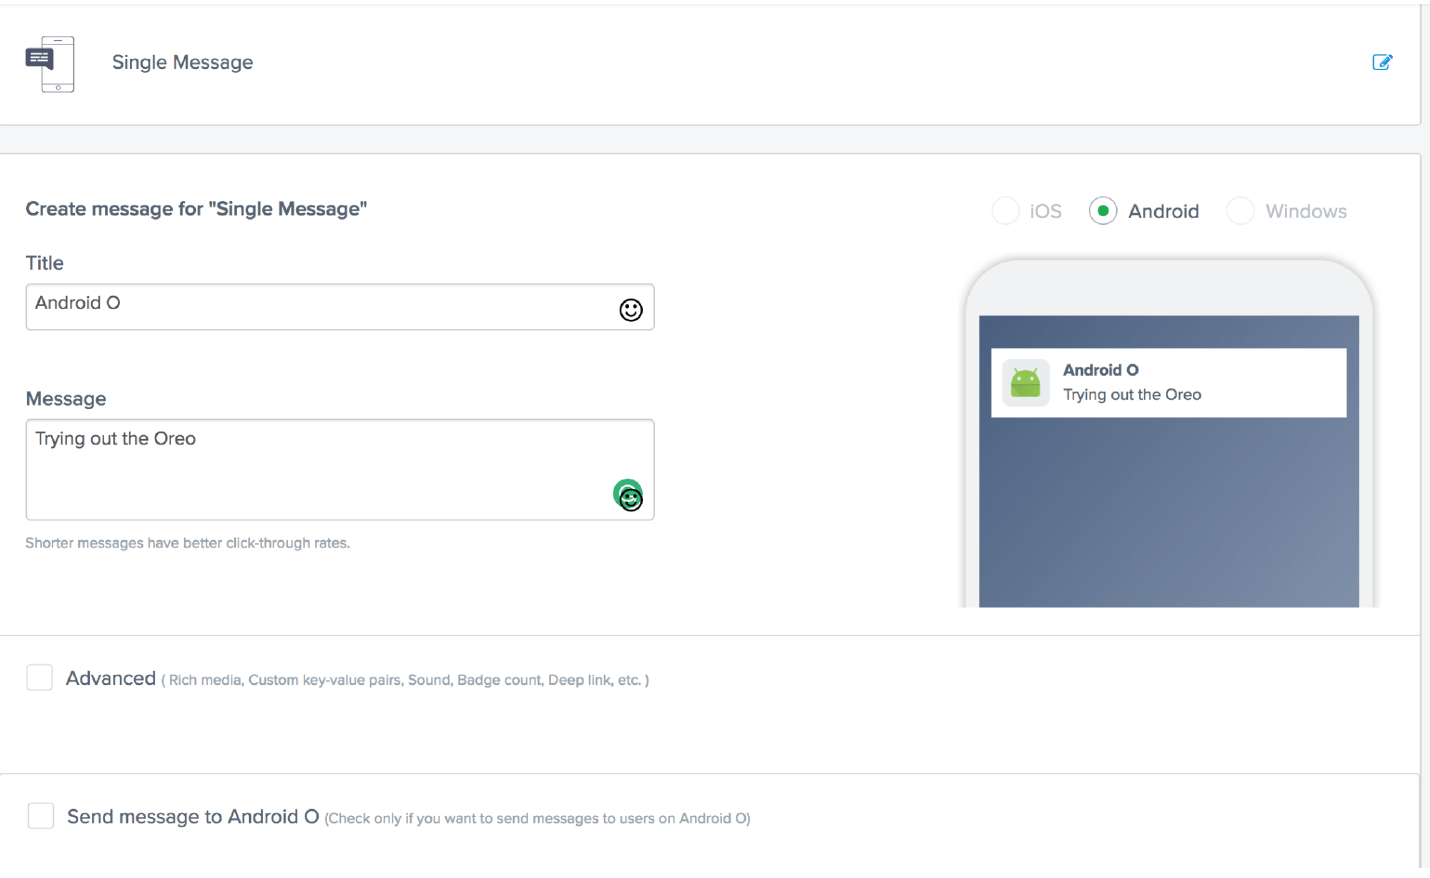
Select the check box which says Send Message to Android O.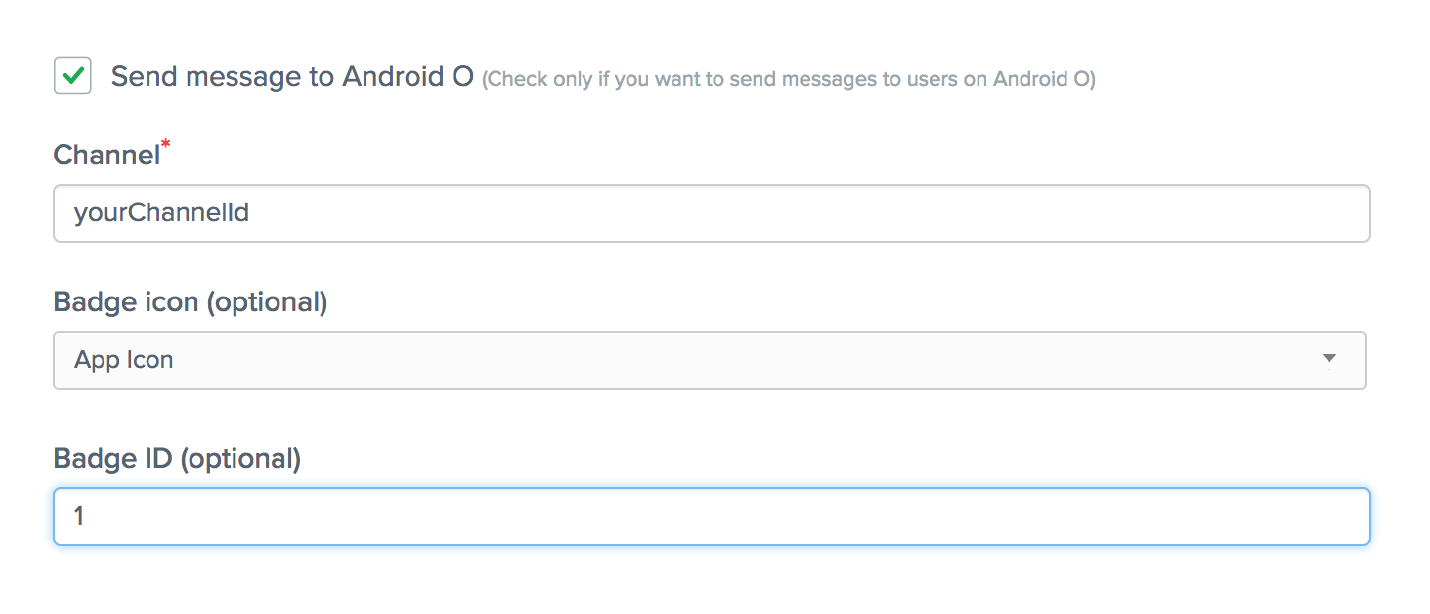
Fill in the Channel with the channel id you used to create the notification channel in your app. This field is mandatory as Android O requires a valid channel to send notifications. Badge Icon can be set as the app icon or the small icon used to denote push notifications. Default is app icon. Badge ID is the number you want to set on the Notification Badge, by default it auto-increments. Both Badge Icon and Badge ID are optional.
Your notification will look like this once you schedule the campaign.
That’s it, by using CleverTap sending Push Notifications to Android O is as simple as eating an Oreo cookie! 😉
Schedule a demo with one of our growth specialists to see CleverTap in action.
The Intelligent Mobile Marketing Platform